

By Elizabeth Wulfhorst |
The gift-giving season is upon us. Don’t panic.
Over the next four weeks in our Holiday section we’ll give you relatively easy recipes for making delicious edible gifts. All these items are perfect for hostess gifts, your kid’s favorite teacher or that hard-to-buy-for uncle or coworker. Take these treats to your holiday book club meeting, give some to your local librarian or just keep them on hand for when guests drop in unexpectedly. (But really, they should call first. It’s kind of rude to go to someone’s house uninvited.)
We’re going to start with the most difficult recipe because early in the season you’re still feeling carefree, thinking you have all the time in the world. You haven’t started frantically adding random items to your Amazon shopping cart, wrapping gifts with newspaper or throwing garland all over the house and calling it “decorated.” Also, this recipe makes a ton of caramels and they keep for a while, so you’ll have them on hand well into the season. A dozen in a pretty bag, tied with a festive bow, make the perfect present. Or wrap them in newspaper. Really, they taste so good no one will care.
And these caramels aren’t hard to make, they’re just a little time-consuming. With the addition of chocolate and flaked sea salt they taste amazing, well worth the time investment. The recipients of these confections will be thanking you for weeks to come and begging for more.
A few tips before you embark on the caramel making.
Follow the directions carefully. You really need a thermometer for these. A few degrees either way and you have a completely different confection. That said, don’t worry if your caramels aren’t the perfect consistency. Undercook them and you’ll have a delicious caramel sauce perfect for packing into glass jars. Overcook them and they’ll be more a sucking candy than a chewing candy (and much harder to cut) but still tasty.
Be patient and pay attention. Caramel takes a while to reach the desired temperature. Put the phone down and focus (now is not the time to be answering emails or checking social media). Think of it as forced down time. There can be something very Zen and relaxing about standing and stirring if you embrace it. Don’t start the caramels if you have someplace to be or if you are in a hurry.
Get everything ready before you start cooking. You don’t want to step away from the caramel for too long and once it hits 230 F things will happen fast. Have all your ingredients measured and within reach. Prep the pan and keep it close; you do not want to be walking around the kitchen with hot caramel.
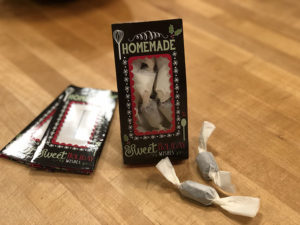
Enlist some help. The caramel making can be a lonely affair (no one wants to stand by for 45 minutes watching you stir) but the wrapping certainly doesn’t have to be. Anyone – even young ones and spouses – can wrap a caramel and twist the ends into a pretty package.
Be careful. Caramel gets hot. Make sure you use good oven mitts and protect yourself from any splatter. Once you pour the caramel into the prepared pan, don’t move it until it’s completely set.
Use high quality ingredients. You don’t have to use organic cream and the most expensive chocolate. I have even used semisweet chocolate chips in a pinch and had a great result. But there are very few ingredients in this recipe and their flavors will really stand out, so choose accordingly. And remember, ’tis the season for splurging.
CHOCOLATE SEA SALT CARAMELS
Start to finish: 1 to 1 ½ hours
Servings: 96-120 caramels, depending how you cut them
2 cups heavy cream, divided
1 ¼ cups light corn syrup
2 ¼ cups granulated sugar
1 teaspoon fine sea salt
5 ounces semisweet chocolate, chopped
4 ounces bittersweet chocolate, chopped
4 ounces (1 stick) unsalted butter, cubed
1 teaspoon vanilla
Flaked sea salt (like Maldon), for sprinkling
Equipment needed:
Parchment paper
Small binder clips
3-quart or larger straight-sided pot
Candy thermometer
Silicone spatula
Empty plate
5-inch square parchment pieces for wrapping
Lightly grease an 8-inch square baking pan with cooking spray. Line with parchment paper both ways so parchment overhangs on all four sides and the entire pan is covered. Clip parchment overhang to the pan with binder clips. Lightly grease parchment with cooking spray. Place an empty plate on your work surface next to the stovetop.
In a large, straight-sided pot, combine 1 cup cream, corn syrup, sugar and salt. Clip the candy thermometer to the pot and bring the mixture to a boil over medium heat, stirring occasionally.
Once the mixture begins to boil (212 F), cook, stirring constantly, until the temperature reaches 220 F. Add the chocolate and butter (keep stirring) and return to a boil. Slowly add the remaining 1 cup cream. The mixture will really bubble, sputter and expand but shouldn’t boil over (this is why you want a large pot). If you are concerned, reduce the heat slightly.
You will now need to stir the caramel for 30-45 minutes (or longer). It will seem as if the temperature is never going to rise above 220 F and then all of a sudden, it will. And it might happen quickly. Do not leave the caramel at this point.
Continue to cook, stirring constantly, until the temperature reaches 245 F on the thermometer. Turn off the heat and stir in the vanilla.
Remove the candy thermometer and place it on the empty plate along with the silicone spatula you were using to stir.
Immediately pour the caramel into the prepared pan, being careful not to touch the hot mixture.
Do not scrape the bowl. Any leftover caramel that doesn’t fall naturally in to the pan can be scraped into a small bowl for you to eat (it’s called “taste testing”).
Leave the caramel to set in the pan without moving it for 30 minutes, then sprinkle with the flaked sea salt to taste. Waiting 30 minutes is necessary or the salt will melt into the caramel (which will still be tasty, but not as pretty).
Allow the caramel to cool undisturbed and uncovered for at least 12 hours.
When you are ready to cut and wrap the caramels, remove them from the pan by undoing the binder clips, grabbing the parchment overhangs and lifting. Place on a cutting board.
Using a very sharp knife or pizza cutter, cut caramels into eight to 10 strips, then cut each strip into approximately 10 pieces. If the knife is sticking, spray it with a little cooking spray. And don’t sweat the size of each piece; uniformity is overrated. These are homemade, remember.
Wrap each piece in a parchment square, twisting the ends to secure.
Store in a cool, dry place. Caramels will keep for up to two weeks, longer in the refrigerator.
Recipe adapted from Erin McDowell for Food52
This article was first published in the Nov. 22-28, 2018 print edition of The Two River Times.


